
Garbage Disposal Leaking From Bottom: Cause and Fix
Key Takeaways
- Water that appears at the bottom of a disposal often starts higher up and runs down.
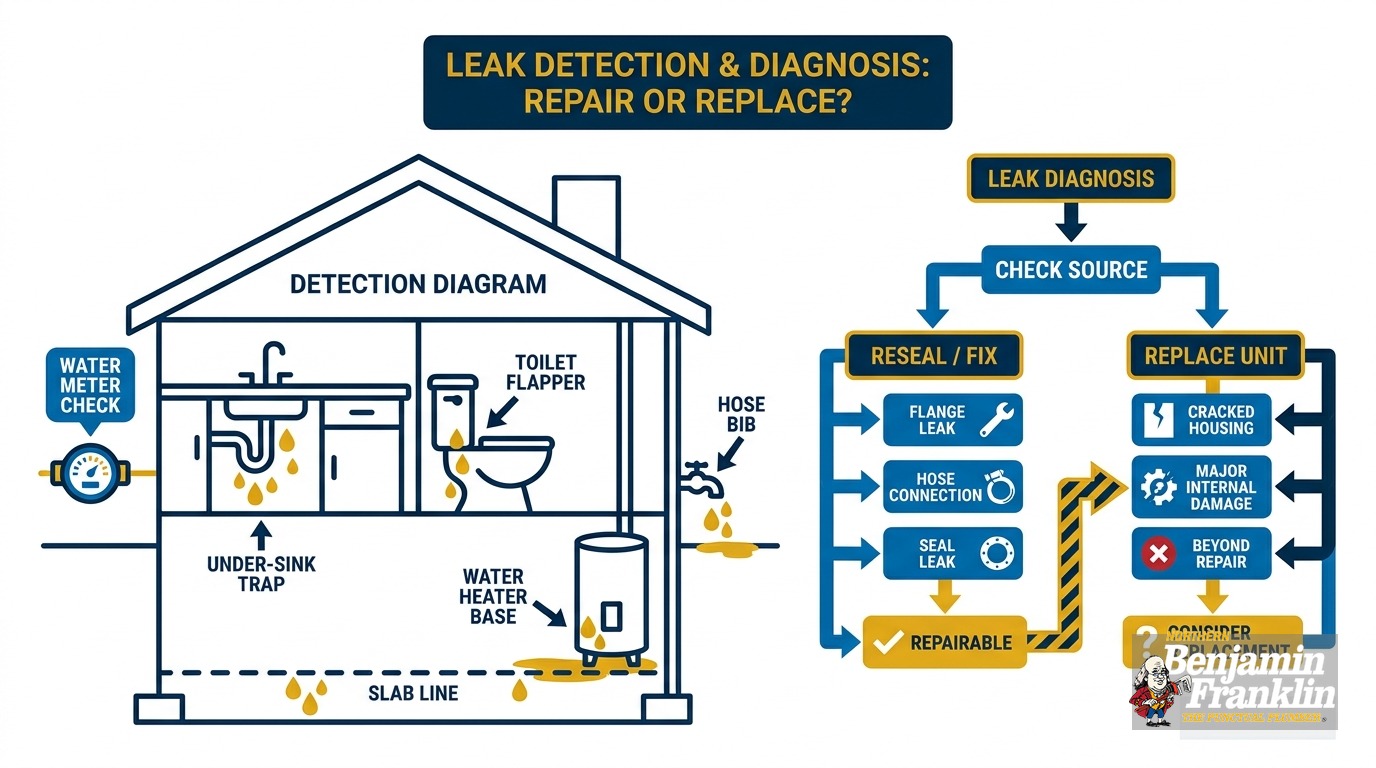
- Check three suspects in order: the sink flange, the dishwasher hose connection, and the housing.
- Flange and hose leaks can be fixed by re-sealing or re-clamping.
- Water coming from the housing body or the base means the unit needs replacement.
- Age matters, but the leak location matters more when you decide between repair and replacement.
- Cut power to the unit before you touch anything under the sink.
- Check with your city about permits. Some Minnesota cities do not require one for a disposal swap.
- Do not wait. Small leaks waste water and can rot the cabinet floor.
Why Is Your Garbage Disposal Leaking From the Bottom?
Water at the bottom of a disposal usually starts somewhere higher and runs down. The three main suspects are the sink flange, the dishwasher hose connection, and the disposal housing itself. Flange and hose leaks are repairable. A cracked housing or failed internal seal means replacement.
The trick is finding which suspect is guilty before you spend money or time on the wrong fix.
Many homeowners see a puddle in the cabinet and assume the unit is done. Sometimes it is. Often it is not. Water follows gravity, so a loose connection near the top can look like a bottom leak.
We are Northern Benjamin Franklin Plumbing, a locally owned and operated Twin Cities plumbing company. We see this problem under Minnesota kitchen sinks all the time. Below is a simple order of checks and what each result means.
What Should You Do First When You Find the Leak?
Turn off power to the disposal, clear the cabinet, and dry everything. Cut power at the wall switch and the breaker, or unplug the unit. Never reach into a disposal with power on. Then you can safely inspect.
A disposal is an electric motor sitting in a wet cabinet. Water and power do not mix.
Do these before you look for the source:
- Flip the wall switch to off.
- Turn off the breaker for the disposal circuit, or unplug the cord if it has one.
- Empty the cabinet under the sink.
- Put a shallow pan or towel under the unit.
- Wipe the disposal, the pipes, and the cabinet floor completely dry.
That last step matters most. You cannot find a leak on a wet surface. Starting dry lets you watch where the first drop appears.
If the unit is hardwired and you see damaged wiring or wet electrical parts, stop. Do not touch it. Call a licensed professional. Electrical repair is not something we do, but we can handle the plumbing side once the wiring is safe.
If the cabinet is flooding, shut off the water supply under the sink. Close the angle stops on the hot and cold lines. If those valves are stuck, our guide on a shutoff valve that won’t turn explains your options.
How Do You Diagnose a Garbage Disposal Leaking From Bottom?
Dry the unit, put paper towels or a dry pan beneath it, and run water in stages. Test the sink alone, then the dishwasher alone. Watch where the first bead of water appears. The first wet spot points to the real source.
This dry-and-watch test takes about 15 minutes. You need a flashlight, a few paper towels, and a dry cabinet.
Step 1: Dry everything. Wipe the disposal body, the flange area, the dishwasher hose, and the discharge pipe. Dry the cabinet floor too.
Step 2: Lay down paper towels. Place a single sheet under the disposal. White paper shows even small drips. Add a second sheet near the dishwasher connection so you can tell the two apart.
Step 3: Fill the sink and let it drain. Plug the sink or fill the basin with a few inches of water. Pull the plug with the disposal off. Shine the light on the top of the unit and around the flange.
Step 4: Run the disposal with water. Turn power back on. Run cold water and the disposal for about 30 seconds. Then check again with the light.
Step 5: Run the dishwasher only. Start a drain cycle on the dishwasher and leave the sink dry. Watch the hose connection and the spot where it meets the disposal.
Each step isolates one suspect. Here is how to read the results:
| Where water first appears | Most likely cause |
|---|---|
| Around the top ring, under the sink drain | Sink flange or mounting |
| Only during the dishwasher cycle | Dishwasher hose connection |
| From the side seam or base of the housing | Cracked housing or failed seal |
| From the pipe on the side of the unit | Discharge pipe gasket or trap connection |
The EPA advises looking for water on the outside of pipes, especially at faucet gaskets and pipe fittings. The same habit helps here. Look for beads of water, not just puddles.
If you see nothing during the test but find water later, the leak may be slow. Leave the paper towels in place overnight and check them in the morning. For more hunting tips, see our post on finding a slow leak under the kitchen sink.
Is the Sink Flange the Source of the Leak?
A flange leak shows up when the sink basin is full or when water runs into the drain. Water seeps past the seal at the top of the unit and runs down the outside. It feels like a bottom leak but starts at the sink.
The sink flange is the metal ring you see in the bottom of your sink. Under the sink, a mounting assembly clamps the disposal to that flange. A ring of plumber’s putty or a rubber gasket sits between the flange and the sink.
Over time, that seal dries out. Years of vibration can also loosen the mounting ring.
Signs of a flange leak:
- Water appears when you fill the sink, even with the disposal off.
- The leak shows near the top of the unit, close to the sink.
- The mounting ring looks wet, rusty, or loose.
- Drips run down the outside of the housing to the base.
The manufacturer’s support page on leaks covers top and discharge leaks, which is where flange problems fall. The mounting assembly is the usual culprit.
How to fix it:
- Make sure power is off.
- Support the disposal and release it from the mounting ring.
- Remove the old putty or gasket from the flange.
- Apply fresh plumber’s putty or a new gasket.
- Reseat the flange and tighten the mounting ring evenly.
- Re-hang the unit and test with a full sink.
A patient homeowner can do this job, but it is awkward. The unit is heavy and the space is tight. If you are not comfortable holding a disposal while you work, call us.
If the flange is cracked or corroded, new putty will not hold. You may need a new flange or a new unit. Check the metal closely before you reseal.
Is the Dishwasher Hose Connection the Problem?
If water appears only when the dishwasher drains, the dishwasher hose connection is the likely source. The hose attaches to a small inlet on the disposal. A loose clamp, a cracked hose, or a bad inlet lets water escape and run down the housing.
Many kitchens drain the dishwasher through the disposal. The drain hose connects to a short nipple on the side of the unit, and a hose clamp holds it in place.
Signs of a hose leak:
- The sink is dry, but water shows up after a dishwasher cycle.
- Water drips from the side of the disposal near the inlet.
- The hose looks cracked, stiff, or kinked.
- The clamp is loose or rusted.
This is why the dishwasher-only step matters. When only the dishwasher is running, any water you see came from that path.
How to fix it:
- Power off the disposal and the dishwasher.
- Loosen the hose clamp with a screwdriver.
- Pull the hose off the inlet and inspect the end.
- Replace the hose if it is cracked or soft.
- Replace the clamp if it is rusty or stripped.
- Reattach the hose and tighten the clamp snugly.
- Run a dishwasher drain cycle and check for drips.
New disposals ship with a knockout plug in the dishwasher inlet. If someone forgot to remove it, the dishwasher will back up. If someone removed it and the inlet is not in use, the opening can leak. Make sure the setup matches your sink.
For more on how the dishwasher ties into your plumbing, read our guide to dishwasher plumbing connections. It explains the air gap, the high loop, and why drain hoses sometimes back up.
If the inlet itself is cracked, the leak is in the housing. That moves you to the next suspect.
How Can You Tell a Cracked Housing From a Seal Failure?
A cracked housing leaks from the body, often as a steady drip from a visible crack or seam. A failed internal seal leaks from the bottom of the unit near the motor, usually with rust or corrosion. Neither can be reliably fixed. Both mean replacement.
This is the serious one. The housing holds the grinding chamber and the motor. Inside, seals keep water away from the motor bearings.
When those seals wear out, water escapes through the base and, over time, damages the motor. A cracked housing is simpler. The shell has split, and water comes through.
Signs of a cracked housing:
- A visible crack or hairline split in the body.
- Water running from the side or the underside of the unit.
- A leak that appears even when the sink is dry and the dishwasher is off, right after use.
- A leak that appears as soon as water flows through the grinding chamber.
Signs of a failed internal seal:
- Water drips from the very bottom of the unit.
- Rust streaks or mineral crust near the base.
- The motor hums, stalls, or trips the reset button.
- The leak appears only when the unit runs.
Try this check. Dry the entire unit, then run water through it with the disposal off, then on. If water forms at the base and every connection above it is bone dry, the source is internal.
A flashlight and a mirror help you confirm. Look at the bottom plate. A wet rust ring around the reset button is a strong clue.
The reset button sits on the bottom of most units. Water at the reset button has likely reached the motor area, and that is a bad sign. If the unit also hums or will not turn, our post on a jammed or humming disposal helps you rule out a simple jam first.
There is no durable repair for a cracked housing. Sealants and epoxy do not hold against vibration, heat, and food waste. A patch might slow the drip for a day, but it will not last. Replace the unit.
When Should You Reseal and When Should You Replace?
Reseal or re-clamp when the leak comes from the flange or the dishwasher hose. Replace the unit when water comes from the housing, the base, or the reset button. Age shapes the call when the cause is unclear, but leak location decides it.
Here is the rule we use at the kitchen sink:
| Leak source | Fix |
|---|---|
| Sink flange or mounting ring | Reseal or replace the flange |
| Dishwasher hose or clamp | Re-clamp or replace the hose |
| Discharge pipe gasket | Replace the gasket or tighten the joint |
| Housing crack or body seam | Replace the unit |
| Internal seal or base leak | Replace the unit |
Age is the gray area. Some guides say to repair a young unit and replace an old one, and they leave the middle years unclear. Here is a practical way to think about it.
A newer unit with a flange or hose leak. Repair it. The connection failed, not the disposal.
A mid-life unit with a flange or hose leak. Repair it if the metal is clean and the motor runs well. Replace it if you see rust, corrosion, or a history of jams.
An older unit with any leak. Lean toward replacement. Even a fixable leak may signal other worn parts. You may fix the drip and face a motor failure next year.
Any unit with a housing or base leak. Replace it, no matter its age.
A few more questions help you decide:
- Has this unit been repaired before?
- Does it jam, hum, or trip the reset button often?
- Is the flange corroded or cracked?
- Does the grind quality seem weak?
- Would a larger or quieter model suit your household better?
If you answer yes to several, replacement is the better value. If the unit grinds well and only a hose leaked, repair makes sense.
We do not publish flat prices, because the right quote depends on the unit, the sink, and the connections. For a real number, call (763) 296-1844 or book online. To see what a swap involves, read our guide to garbage disposal installation or visit our garbage disposal service page.
What Other Leaks Look Like a Bottom Leak?
The discharge pipe gasket, the drain trap connections, and the supply line to the sink faucet can all drip onto the disposal and mimic a bottom leak. Check these before you condemn the unit. They are cheaper to fix.
Water travels. A drip from the faucet supply line can land on the disposal and run down its sides. A loose trap joint can spray water onto the unit.
Check these spots:
- The discharge pipe. This pipe leaves the side of the disposal and connects to the trap. A gasket seals the joint. If the bolts are loose or the gasket is worn, water escapes. The manufacturer’s support page lists discharge leaks as one of the two leak types it covers.
- The trap and trap arm. These slip-nut joints can loosen. Hand-tighten, then test.
- The faucet supply lines. Flexible lines can crack or seep at the fittings. Our post on flexible supply line replacement shows what to look for.
- The faucet base. A leak at the faucet can run down the pipes and land on the disposal.
Run a quick test. Wipe each connection dry. Turn on the faucet only, with the drain plugged, and watch the supply lines and the faucet base. If the water shows up there, the disposal is fine.
A backed-up drain can also push water out of a loose joint. Then you have two problems. See our post on a kitchen sink clogged with a garbage disposal for that angle.
Do You Need a Permit to Replace a Garbage Disposal in Minnesota?
Permit rules vary by city. Brooklyn Park, for example, lists new or replacement garbage disposals as plumbing work that needs no permit for one- and two-family homes. Other cities may differ, so check with your city before you start.
The Brooklyn Park page lists “New or replacement of garbage disposals” under work that does not need a permit. It adds a condition. The exemption holds “unless the plumbing work poses an unsanitary or hazardous condition.”
We could not confirm the rules for every Twin Cities suburb. Minneapolis, St. Paul, and the rest each set their own process. A short call to your city’s permit office settles it.
Minnesota’s plumbing code also sets basics for the drain. The code table lists a minimum trap and trap arm size of 1-1/2 inches for a kitchen sink, with or without a food waste grinder, dishwasher, or both. That matters when a swap changes your drain layout.
A licensed plumber helps even when no permit applies:
- The new unit must line up with your existing drain and trap.
- The dishwasher connection must be done correctly.
- The flange must seal to your sink material.
- A wrong connection can leak, back up, or cause a hazard.
A clean install protects your cabinet and your warranty. A messy one brings you right back to a puddle.
Why Is Waiting on a Disposal Leak a Bad Idea?
Small leaks waste water, soak cabinets, and invite mold. The EPA says household leaks waste nearly 1 trillion gallons of water a year nationwide. A slow drip under the sink adds to that, and it can damage your cabinet floor long before you notice.
The EPA reports that household leaks waste nearly 1 trillion gallons of water annually nationwide. The average home’s leaks can waste more than 9,300 gallons per year. Some homes have leaks that waste 50 gallons or more per day.
Those are whole-home figures, not disposal-only numbers. They still show what waiting costs.
Under a sink, the damage is more direct:
- Cabinet rot. Particleboard swells when it stays wet. It crumbles and warps.
- Mold. A dark, damp cabinet grows mold fast.
- Pests. Moisture draws insects.
- Hidden spread. Water can travel along pipes into the wall or floor.
- Motor damage. Water reaching the motor shortens the life of the unit.
Many older Twin Cities houses have original cabinets and aging supply lines. A small leak can sit unseen for months. Add winter’s dry indoor air and summer’s humidity, and cabinet damage can move fast.
Check under your sink once a month. Look, touch, and sniff. If you smell musty air or see stains, act. Our guide on hidden plumbing damage lists other places to look.
What Can You Do to Prevent Disposal Leaks?
Run cold water with the unit, avoid grease and hard scraps, and check connections twice a year. Gentle habits protect seals and mounts. These steps will not stop every leak, but they cut the odds.
Prevention is cheap. Try these habits:
- Run cold water before, during, and after each use.
- Feed scraps in small amounts, not all at once.
- Keep grease, bones, fruit pits, and fibrous peels out.
- Avoid harsh chemical drain cleaners. They can damage seals and pipes.
- Check the cabinet floor each month for dampness.
- Tighten the dishwasher hose clamp when you see it loosen.
- Replace worn flexible lines before they fail.
Grease is a top enemy. It coats pipes and clogs the trap, and pressure can force water out of weak joints. Our post on grease and kitchen drain clogs explains how to stop the buildup.
For seasonal habits, see our summer disposal maintenance tips. They apply year-round.
When Should You Call a Plumber?
Call a plumber if you cannot find the leak, if water comes from the housing or base, or if you are unsure about power and connections. A pro can diagnose fast and replace the unit cleanly.
DIY works for a hose clamp or a flange reseal. It is a poor fit when the unit is heavy, the space is cramped, or the cause is unclear.
Call us when:
- Water comes from the base, the body, or the reset button.
- The unit is old and has leaked before.
- You cannot tell which connection is failing.
- The cabinet floor is soft or stained.
- The sink drain also backs up.
- You want a new unit installed correctly.
We are Northern Benjamin Franklin Plumbing, locally owned and operated, serving Minneapolis, St. Paul, and the surrounding suburbs. We handle garbage disposal repair and installation as part of our plumbing services. If a swap is the right call, our garbage disposal installation service covers it.
We also know your time matters. That is why we back every visit with our On-Time Guarantee(R). We arrive in the window you pick, or we pay you $5 for every minute we are late, up to $300. In plain words: “If there is any delay, it’s you we pay!”
Our 100% satisfaction guarantee also stands behind the work.
If the leak is not at your disposal at all, we can help there too. A drip near the kitchen sink may point to supply lines or a drain joint. If it is a larger water problem, such as a leaking pipe, we can track that down.
Your water heater can also leak from its base. If the puddle is in the basement instead of the kitchen, read about a water heater leaking from the bottom. The causes differ, but the first steps are similar: shut off power, dry the area, and find the source.
A Simple Checklist to Take With You
Print this or save it on your phone before you head to the sink.
- Turn off power at the switch and breaker.
- Empty the cabinet and dry everything.
- Lay paper towels under the unit and the hose.
- Fill the sink and watch the flange.
- Run the disposal with water and watch the body.
- Run the dishwasher alone and watch the hose connection.
- Note where the first drop appears.
- Match the result to the table above.
If the source is the flange or hose, repair it. If the source is the housing or base, replace the unit. If you cannot tell, call a plumber.
Get Your Kitchen Sink Dry Again
A leaking disposal is rarely a mystery once you test it in order. The first wet spot tells you what to do. Do not wait on a slow drip, because your cabinet pays for the delay.
Ready for a clear answer and a clean fix? Call Northern Benjamin Franklin Plumbing at (763) 296-1844 or book online. We will diagnose the leak, explain your options, and get your sink working again.
Frequently Asked Questions
What is the average cost to replace a garbage disposal? +
What is the life expectancy of a garbage disposal? +
Need a technician now?