
Under Sink Water Supply Line Replacement: When to Act
Key Takeaways
- Braided stainless supply lines can look completely intact on the outside while the rubber inner tube is deteriorating. The outer wire jacket hides the damage.
- The failure sequence starts with individual braid wires fracturing from corrosion, not a visible crack or kink. By the time you can see something wrong, the line is already close to rupturing.
- Chlorine from cleaning products stored in the same cabinet is the leading corrosion accelerator, according to Hawkins engineering analysis.
- A ruptured line releases water at full household line pressure - typically 40-80 psi - until someone shuts off the supply. That means hundreds of gallons per hour in a closed cabinet.
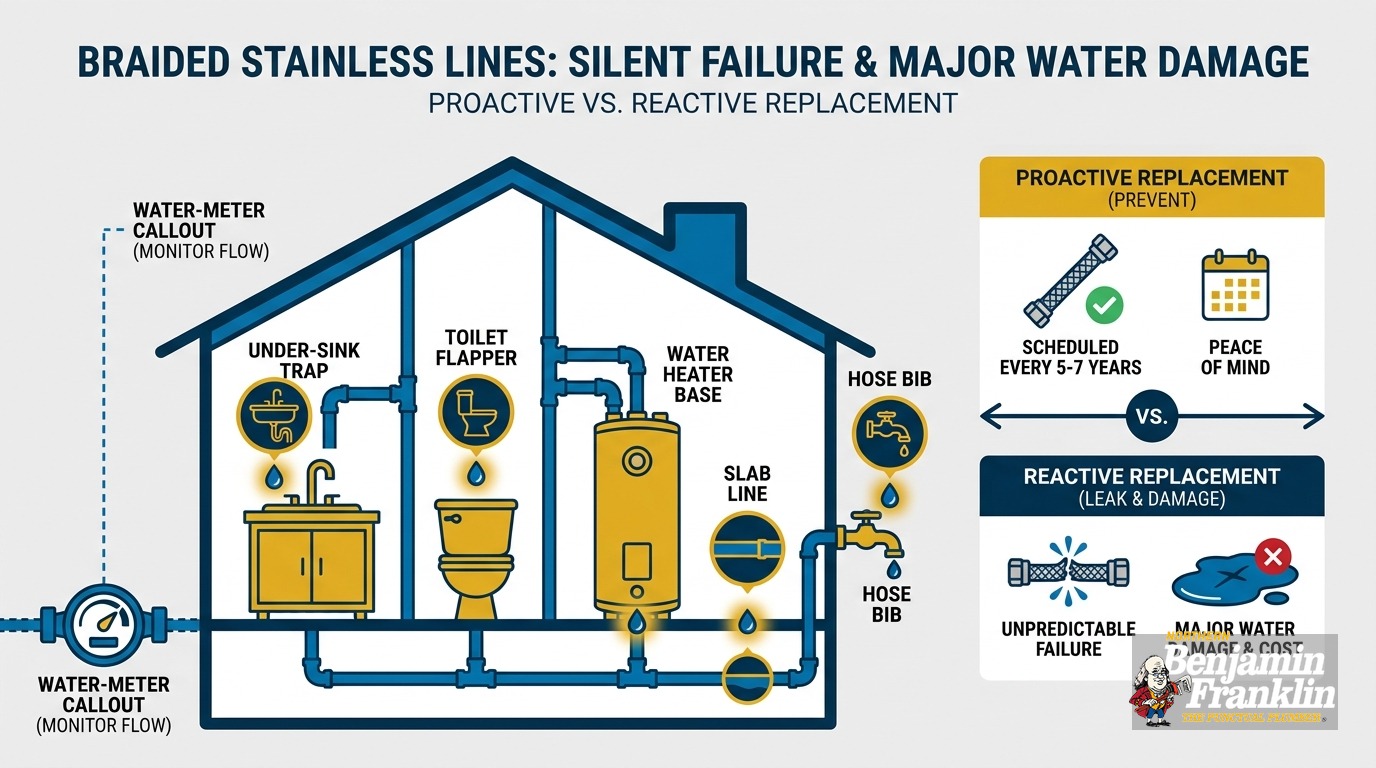
- Replace lines proactively at 5-7 years. Lines over 7 years old should come out now.
- Check the shutoff valve at the same time. A seized valve and a burst line together are a worst-case combination.
- In Minneapolis, swapping just the braided connector is typically permit-exempt. Replacing the shutoff valve requires a permit under Minnesota plumbing code.
The Supply Line Most Homeowners Never Inspect
Open the cabinet under your kitchen or bathroom sink and look toward the back wall. Two short, flexible connectors run from the shutoff valves mounted to the wall up to the faucet body above. Those are the water supply lines. They carry every drop of water that comes out of that faucet.
Most homeowners never look at them twice. They are tucked in a dark corner, they do not make noise, and they cost very little to buy. A replacement braided stainless line is a standard hardware-store item. The water damage that follows a rupture is not small, though.
Interior water damage is one of the most consistent sources of insured losses for homeowners, and the frequency and severity of those claims keep rising as homes add more water-using appliances and connections. Supply lines sit under kitchen sinks, bathroom vanities, and behind toilets. Any one of them can fail. This post focuses on the under-sink variety: why they fail silently, how to know when yours are due for replacement, and what the process looks like whether you do it yourself or call a plumber.
Why Do Braided Stainless Lines Fail Without Warning?
The outer braid conceals inner tube deterioration. Individual braid wires fracture from corrosion - a process invisible to a quick visual scan. When enough wires break, the inner rubber tube bulges through the gap. Under household line pressure, that bulge ruptures and releases water until the supply valve is closed.
The stainless braid is the part you see. It gives the line its industrial look and its name. But the braid is a jacket, not the water-carrying component. The inner tube - typically rubber or EPDM - carries the water, and the braid holds its shape around it.
That protective layer is also a concealment layer. As individual braid wires corrode and snap from fatigue or chemical attack, the outer jacket does not collapse or deform. It holds its cylindrical shape while internal integrity drops wire by wire. There is no drip, no unusual noise, no color change on the outside. A line that is days away from rupturing looks identical to a line that just came out of the box.
Hawkins engineering consultants studied this failure mode in detail. Between 2010 and 2015, most failed hoses they investigated had failed within 5 years of installation. Chemical testing found lower-grade stainless alloys lacking sufficient chromium and nickel. Since 2015, Hawkins has documented failures even in 18/8 (AISI 304) grade braids - the widely accepted quality standard - suggesting the vulnerability is partly inherent to the design itself, not only a cheap-manufacturing problem.
This is why the standard advice to “look for kinks or cracks” misses the real failure mode. A line in the process of failing often has no visible surface damage at all.
What Stored in Your Cabinet Makes It Worse?
Cleaning sprays, bleach, and toilet bowl cleaner release chlorine inside enclosed cabinets. That chlorine concentrates between braid wires, reacts with moisture, and drives crevice corrosion faster than normal aging alone. Moving those products to a different cabinet removes the main accelerant.
Most homeowners store cleaning products under the kitchen sink: dish soap, all-purpose spray, scrubbing powder, and sometimes bleach or drain cleaner. It is a convenient spot. It is also where the under-sink supply lines live, inside a small enclosed space with limited airflow.
Chlorine-based cleaners off-gas even when the cap is on. In a sealed cabinet with no air movement, that concentration builds. Hawkins’ failure analysis confirmed that liquid chlorine concentrates inside the braid wires as the hose dries after contact, and that moisture trapped between wires sustains the crevice corrosion reaction. The combination of chlorine and trapped moisture accelerates braid wire failure well past the normal rate.
Twin Cities homes built in the 1950s and 1960s - a large share of the housing stock across Minneapolis, St. Paul, and the inner-ring suburbs - often have tight base cabinets with minimal clearance and poor ventilation. Less airflow means chlorine stays concentrated longer. The fix takes about 30 seconds: move the cleaning products to a different cabinet or a pantry shelf. It will not reverse existing wire damage, but it removes the accelerant going forward.
What Happens When a Line Ruptures?
A supply line rupture is not a drip. The inner tube blows under full household line pressure - typically 40-80 psi - and water discharges at hundreds of gallons per hour. In a closed cabinet under a sink, that water can run for hours before it shows on the floor outside the cabinet doors.
Most people picture a failing supply line as a slow seep that grows into a trickle and eventually prompts a towel on the floor. The actual failure mode under pressure is categorically different. The inner tube fractures and the full discharge rate for your line pressure opens immediately.
The EPA reports that the average household loses roughly 9,400 gallons per year to leaks of all kinds. A pressure-loaded supply line rupture can deliver that much water in a matter of hours. The cabinet below the sink absorbs the first wave. Water saturates the cabinet floor, soaks into the subfloor, and wicks into adjacent walls - all before any water reaches the room floor beyond the cabinet doors.
AIG data cited by Hawkins found that flexible braided hoses accounted for around 20% of water damage claims in 2016. That is a significant share of the interior water damage problem attributable to a component that costs a small amount to replace proactively.
What Size Water Supply Line Do You Need for a Bathroom Sink?
Most bathroom sink supply lines use a 3/8-inch compression fitting at the shutoff valve end and a 1/2-inch or 7/16-inch nut at the faucet end - but those two ends are often different sizes. Measure both connection points before buying. Also measure the distance between them and add 2-3 inches of slack to avoid tension on the fittings.
Standard bathroom faucets use a 3/8-inch or 1/2-inch compression fitting at the shutoff valve. The faucet end typically accepts a 1/2-inch or 7/16-inch ballcock nut, depending on the manufacturer. Kitchen faucets usually use the same 3/8-inch valve end but may take a different fitting at the faucet body. The two ends are not always the same diameter, so measure both before going to the store.
To get the dimensions right: turn off the water, look at the fitting where the line meets the shutoff valve, and note the diameter. Then look at where the line connects to the faucet shank below the sink and note that diameter separately.
Length matters as much as diameter. A line that is too short puts tension on the compression fittings at both ends - tension that works them loose over time. A line that is too long kinks inside the cabinet and creates a pressure point on the rubber inner tube. Measure the actual distance between the valve outlet and the faucet connection, then buy a line 2-3 inches longer. Most hardware stores carry braided stainless in standard lengths from 12 to 36 inches.
If you are replacing a damaged line and notice the shutoff valve is stiff, corroded, or slow to close, address both at the same time. Our post on angle-stop shutoff valve replacement covers what to look for and when a valve replacement is the smarter call.
How Do You Replace a Hot Water Supply Line Under a Sink?
Shut off the angle-stop valve below the sink. Open the faucet to release pressure and verify the shutoff worked. Disconnect the faucet end first, then the valve end. Attach the new line finger-tight at both ends, then snug with a wrench - about a quarter turn past hand-tight for compression fittings. Restore water slowly and check for drips.
The hot-side replacement is identical in steps to the cold side. Here is the full process:
-
Find the angle-stop valve on the hot water side below the sink. It is the small shutoff mounted to the wall or floor stub-out. Turn it clockwise until it stops.
-
Open the hot water tap at the faucet. Water should slow to a trickle and stop. If it keeps running freely, the valve is not seating. Stop there. You will need to shut off the main water supply, and this job has become a valve replacement too. Call (763) 296-1844 if you want a plumber to take it from here.
-
Disconnect the faucet end first. Use channel-lock pliers or a basin wrench if the fitting is up inside the faucet body. Have a small rag or bucket ready - some water will drain out.
-
Disconnect the valve end. Inspect both connection points. Corroded threads, a cracked compression seat, or deformed threads mean those components need replacement, not just the line itself.
-
Install the new line. Thread each end by hand first to avoid cross-threading. For standard compression fittings, snug with a wrench about one-quarter to one-half turn past finger-tight. Overtightening can crack a plastic faucet shank.
-
Restore the water slowly. Open the angle-stop valve gradually and watch both connection points for 60 seconds. No drips means you are done.
Older Twin Cities homes with small base cabinets sometimes have very little room to work above the shutoff valve. If the space is tight, a line with a swivel or angled fitting at the faucet end makes threading it into position much easier. These are available at most hardware stores alongside the standard straight connectors.
While you are under the sink, it is worth checking the condition of the P-trap and drain connections as well. Our post on P-trap replacement under a bathroom sink covers when that component needs attention and what the replacement looks like.
How Long Should a Water Supply Line Last?
Manufacturer guidelines typically say 5 to 10 years. Real-world failure data tells a different story. Hawkins’ failure investigations found most failed hoses in their study period had failed within 5 years of installation - well inside any recommended service interval. Since 2015, Hawkins has documented failures in 18/8 grade braids, which are the quality product. The service-life guidance and the actual failure history do not line up cleanly.
The more practical question is not what the manufacturer says but what your specific situation looks like. Use this decision tree:
- Under 5 years, no visible damage: Run your fingers along the full length of the line. A fractured wire in the outer braid feels like a sharp snag or a stiff spot against otherwise smooth wire. If the surface is uniform, no immediate action is needed - but write down the installation year somewhere.
- 5-7 years old: Inspect carefully. Any corrosion spots, discolored sections, or rough texture in the braid are signals to replace it now.
- Over 7 years old: Replace it. The cost of a new braided line is a fraction of even a minor water damage claim. Do not wait for a visible sign.
- Any age + cleaning products stored in the same cabinet: Relocate the products and inspect the line immediately. The accelerated corrosion environment makes age guidance less reliable.
- Any age + shutoff valve that has never been turned: Plan to replace the line and inspect the valve at the same time. Two minutes to test a valve is far cheaper than finding out it is seized during an emergency.
Can You Connect Two Water Supply Lines Together?
You can, using a compression union coupling in the matching diameter. But adding a coupling adds a third connection point to a run that normally has two. Connection points are where leaks start. If the line is simply too short, buy a single line in the correct length instead of joining two.
Compression couplings that join two supply lines are real products, available at hardware stores, and they work. The issue is not the fitting itself but what it introduces: a joint. A standard under-sink supply line has two connection points - the valve end and the faucet end. A mid-run coupling adds a third. The more connections, the more opportunities for a fitting to work loose over time or develop a drip.
If the reason you are considering a two-line run is that the current one is too short, buy the right length. Most hardware stores stock braided stainless in 12-inch increments from 12 to 36 inches. If your specific setup requires a longer run - a farmhouse-style sink with a deeper cabinet, or an unusually distant shutoff location - buy a single line in the correct length and route it cleanly.
The one practical exception is a temporary repair: you need water back on and the correct-length line is not available until the next store trip. A coupled two-line connection is acceptable in that situation. Turn the water back off as soon as the right replacement is in hand and do the full swap.
What Do Twin Cities Homeowners Need to Know About Permits?
In Minneapolis, swapping just the braided supply line connector on an existing faucet is typically exempt from permit. Replacing or modifying the shutoff valve is a different category. Minnesota plumbing code requires a permit before starting any installation, replacement, or extension of a plumbing system. When unsure, call Minneapolis Construction Code Services at (612) 673-3000.
Minneapolis’s list of work exempt from permit covers reconnecting an existing supply line to a similar replacement appliance without altering the supply piping. Simply replacing the braided flexible connector between the existing shutoff valve and the existing faucet - no pipe changes, no valve changes - typically falls under that exemption.
The moment you add or replace the angle-stop shutoff valve, Minnesota Rules require a permit before beginning the work. Homeowners who own and occupy their home as a homestead can pull that permit themselves. If you are not sure whether your project crosses the line, a quick call to (612) 673-3000 gets you an answer before work starts.
The shutoff valve question matters specifically in the Twin Cities because of what Minnesota winters do to plumbing components. A home that went unoccupied through a hard January, or one with older gate-style shutoffs that have not been turned since installation, often has valves that will not fully close when you need them. Finding out your valve is seized at the same moment a supply line is spewing water is a worst-case combination - the kind that turns a quick repair into a water damage claim.
Minneapolis water runs moderately hard by national standards. That hardness level will not dramatically accelerate scale buildup on supply line fittings on its own. The chloramines used in Twin Cities water treatment do contribute to rubber inner-tube degradation over time. That is one more reason proactive replacement at 5-7 years makes sense rather than waiting for a visible signal.
When Should You Call a Plumber for Supply Line Work?
Call if the shutoff valve will not close, if connection threads are stripped or corroded, or if you find evidence of prior water damage - staining, soft subfloor, swollen cabinetry - under the sink. Those signs mean the problem may be larger than the supply line itself.
Most braided supply line replacements under a kitchen or bathroom sink are within reach of a homeowner comfortable with turning off a valve and working in a tight space. The job becomes a plumber’s call in these situations:
- The shutoff valve will not close. If turning the valve clockwise does not stop the water, do not continue. You will need to shut off the main water supply. Our post on finding and testing your main water shutoff valve covers where to locate it and how to verify it works before you are in an emergency.
- The connection threads are stripped, corroded, or mismatched. Forcing a fitting onto damaged threads will not produce a reliable seal.
- There is evidence of past water damage under the sink: staining on the cabinet floor, a soft or spongy feel to the subfloor, or swollen cabinet walls. Those signs suggest water has already been getting somewhere it should not, and the scope of the repair may extend beyond the line itself.
- The fixture connects to older supply nipples made of corroded galvanized steel or early-era brass - a common find in Minneapolis and St. Paul homes built before 1970.
- You are not confident about fitting sizes or connection types and prefer not to make multiple hardware store runs with the water shut off to the kitchen or bathroom.
Northern Benjamin Franklin Plumbing is locally owned and operated in the Twin Cities. Our On-Time Guarantee(R) means we arrive in the window you choose - or we pay you $5 for every minute we are late, up to $300. If there is any delay, it’s you we pay!
Call us at (763) 296-1844 or book your appointment online. A supply line replacement is a quick job when the fittings cooperate. Our team handles the ones that do not.
Frequently Asked Questions
How do you fix a leaky PVC pipe under a sink? +
Need a technician now?