
Leak Under Kitchen Sink: Find the Source Fast
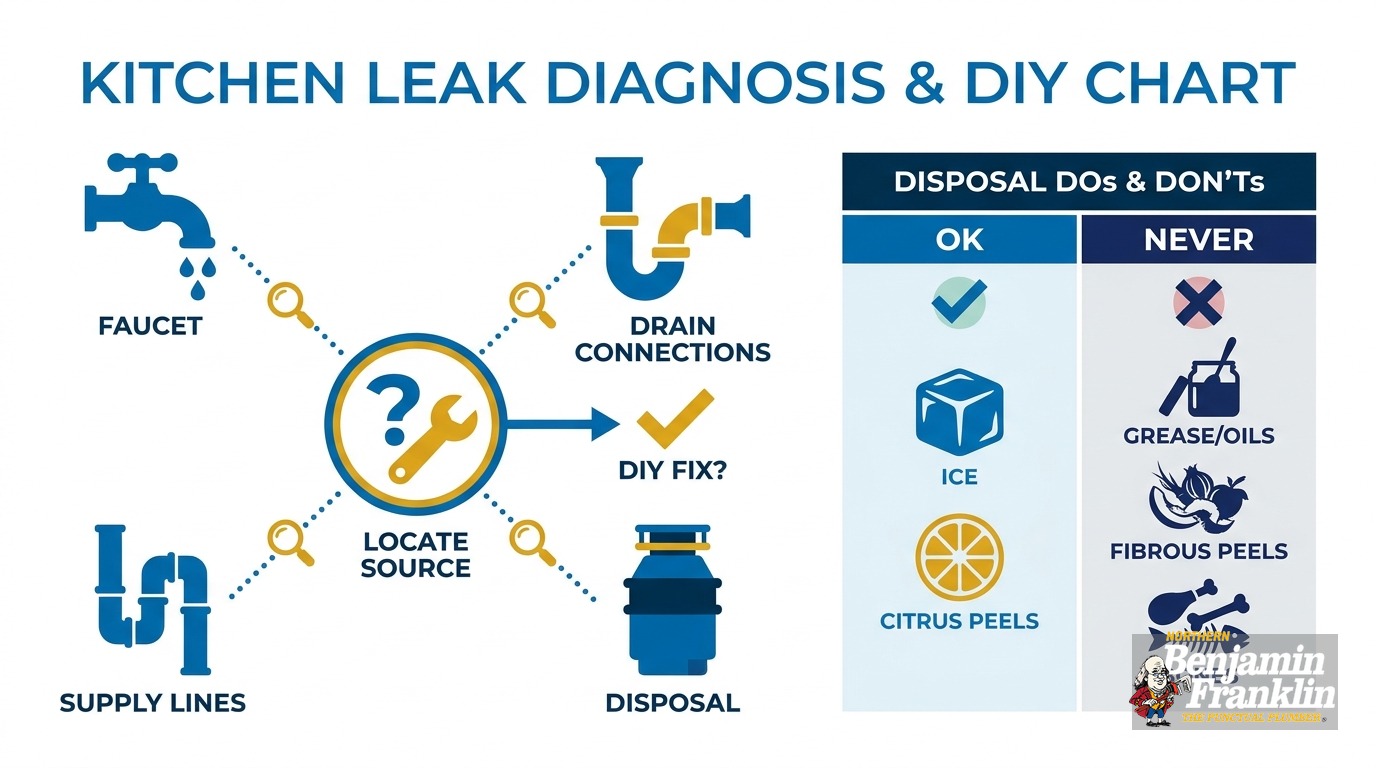
Key Takeaways
- Sort the leak by timing. Water with the faucet off is a supply problem. Water only while draining is a drain problem. Water only when you move the handle is a faucet problem.
- Dry everything first. Then test one part at a time with a dry tissue.
- Shut off the water at the angle stops. Unplug the disposal and switch off its breaker before you touch it.
- Loose slip nuts, worn washers, and cracked flexible supply lines are common DIY fixes.
- Stop and call a pro if a leak returns after one tightening, the disposal shell is cracked, or the cabinet floor is soft.
- Run a two-hour water meter test if you cannot find a visible source.
- Call Northern Benjamin Franklin Plumbing at (763) 296-1844 or book online.
How Do You Find a Leak Under the Kitchen Sink Fast?
Short answer: Dry the whole cabinet, then watch when the water appears. A drip with the faucet closed points to supply lines. Water that shows up only while draining points to drain connections or the disposal. Water that shows up only when you move the handle or sprayer points to the faucet.
It’s easy to ignore a leak under the kitchen sink at first. You spot a damp patch, or a smell hits you when you open the cabinet. You wipe it up and move on.
Then it comes back. By then, the particleboard floor of the cabinet may have soaked up water for weeks.
Four parts live under that sink, and each leaks in its own pattern:
- Supply lines and shutoff valves. These carry pressurized water to the faucet.
- Drain connections and the P-trap. These carry used water away. The P-trap is the curved pipe that holds a small plug of water to block sewer gas.
- The faucet itself. Water can run down the faucet body or the sprayer hose into the cabinet.
- The garbage disposal and dishwasher connections. These add several joints to the drain side.
Most guides have you check one part at a time, which wastes hours. Sort the leak by timing first. Then test only the parts that fit the pattern.
Below you’ll find which fixes are safe for a homeowner and where to stop.
What Should You Do Before You Start Testing?
Short answer: Clear the cabinet, dry every surface, and shut off the water at the angle stops. If you have a disposal, unplug it and switch off its breaker. Then put a light and a dry towel under the sink.
Don’t skip this step. Water and electricity share this cabinet.
Follow this order:
- Empty the cabinet. Remove cleaners, bins, and anything that blocks your view. Check them for damp or moldy bottoms.
- Unplug the disposal. Many disposals plug into an outlet under the sink. If yours is hardwired, switch off its breaker at the panel. Never put your hand in the disposal.
- Find the shutoff valves. Each one is a small oval or round handle on a pipe below the faucet. They are called angle stops. Turn them clockwise to close.
- Dry everything. Wipe every pipe, nut, and hose with a towel. A pipe that looks wet may only be sweating from cold water.
- Add light. A phone flashlight works. A headlamp is better because it keeps both hands free.
- Place a dry tissue or paper towel under each joint. White tissue shows even a tiny bead of water.
If a shutoff valve will not turn, don’t force it. A stuck valve can snap and flood the cabinet. Our guide on what to do when a shutoff valve will not turn explains replacement options. If you can’t stop the water at all, shut off the main valve for the whole home and call us.
Is the Leak on the Supply Side, the Drain Side, or the Faucet?
Short answer: Use three quick checks. With the faucet off and the angle stops open, watch for drips. Run water and watch the drain parts. Then move the faucet handle and sprayer and watch the faucet body. Each check isolates one group of suspects.
Work through these from top to bottom, and keep everything dry between steps.
Check 1: Water on, faucet off. Open the angle stops. Leave the faucet closed. Wait ten minutes with tissue under each supply joint.
- Tissue gets wet: the leak is on the supply side. Go to the supply line section.
- Tissue stays dry: move to Check 2.
Check 2: Water draining. Close the drain with the stopper if your sink has one. Fill one basin and let it drain. Then do the other basin. Watch the P-trap, the slip nuts, and the disposal.
- Water appears only while the sink drains: the leak is on the drain side.
- Nothing appears: move to Check 3.
Check 3: Handle and sprayer movement. Run the faucet. Move the handle through its full range. Pull the sprayer or pull-down head, then let it retract.
- Water appears only when you move the handle or use the sprayer: the faucet is leaking.
- Nothing appears at all: the leak may be small or intermittent. Try the dishwasher and the meter test later in this guide.
This sorting step saves the most time. Tightening a drain nut will never stop a supply line drip.
How Do You Check Supply Lines and Shutoff Valves?
Short answer: Run a dry tissue along each supply line from the angle stop to the faucet. Check both ends of the hose, the valve stem, and the valve body. A wet tissue at a nut means a loose connection or a worn washer. A wet braid means the hose is failing.
Supply lines are the flexible braided hoses that connect the angle stops to the faucet. They are under pressure all day, even when nobody uses the sink. That is why a supply leak shows up with the faucet closed.
Check these spots:
- The nut at the angle stop. A bead of water here often means the nut is loose or the washer is worn.
- The nut at the faucet end. The signs are the same, but it’s harder to see. Use a mirror or your phone camera.
- The valve stem. Water at the handle of the angle stop points to a worn packing seal.
- The hose itself. Look for rust-colored stains, bulges, or kinks in the braid. These mean the hose is near the end of its life.
DIY fixes that usually work:
- Snug a loose nut an eighth to a quarter turn with a wrench. Don’t crank. Over-tightening can crush the rubber washer or crack the fitting.
- Replace a worn flexible hose. Shut off the water, disconnect, install a new line, and test. Our guide to replacing a flexible supply line under a sink covers the steps.
Stop and call a plumber if:
- The leak continues after one tightening.
- The angle stop itself leaks from the body, not the handle.
- The valve will not close.
- You see green or white crust on copper pipe. That can mean a slow leak inside the wall.
Minnesota homes vary a lot in age. Older Twin Cities houses may have stops that haven’t moved in decades, and they can fail the first time you turn them. If that sounds like your home, a plumber can replace them safely.
How Do You Check the Drain Connections and P-Trap?
Short answer: Fill a basin and let it drain while you hold a dry tissue under each joint. Check the slip nuts on the P-trap, the tailpiece under each basin, and the pipe leading into the wall. Drips that appear only during draining are drain-side leaks.
The drain side isn’t under pressure. It leaks only when water runs through it, so a drain leak can hide for days if you don’t use the sink.
A typical double-bowl kitchen sink has:
- A basket strainer in each basin, sealed with plumber’s putty or a gasket.
- A tailpiece, which is the straight pipe below each strainer.
- A tee or continuous waste that joins the two basins.
- A P-trap, which is the U-shaped bend.
- A trap arm that leads into the wall.
Fill both basins. Drain one at a time. Then drain both at once. Some leaks show up only under the extra flow.
Where drain leaks usually start:
- Under the strainer. If water drips from the top of the tailpiece, the seal under the sink basin has failed.
- At slip nuts. These are the large plastic or metal nuts that hold the trap together. They loosen over time.
- At cracked or old fittings. Plastic traps can crack. Metal traps can rust through at the bottom.
- At the wall connection. A leak here can leave a ring on the back of the cabinet.
DIY fixes:
- Hand-tighten slip nuts first. Then give a small turn with pliers if needed.
- Check that the washers inside the slip nuts sit flat and are not folded.
- Replace a cracked plastic trap. It’s a simple parts swap and needs no special tools. Our guide on replacing a P-trap shows the same steps for a bathroom sink.
- Redo the strainer seal with fresh putty or a new gasket.
Stop and call a plumber if:
- The pipe at the wall is corroded.
- Water leaks from where the pipe enters the wall.
- You smell sewer gas that does not go away after the trap fills with water.
- The drain backs up as well as leaks. That may point to a clog further down the line.
A slow drain with a leak is a special case. Water that can’t flow away pushes against weak joints, so the leak may be a symptom. Our guide to kitchen sink clogs with a garbage disposal covers that overlap.
How Do You Tell If the Faucet Is Leaking?
Short answer: Run the faucet and move the handle, spout, and sprayer while watching the cabinet below. If water appears only during those movements, the leak is in the faucet body, the sprayer hose, or the base seal. A drip from the spout itself is a separate problem.
Water travels, which makes faucet leaks tricky. A leak at the faucet base can run down the hoses and drip from a supply nut, so it looks like a supply problem.
Use this approach:
- Dry everything again, including the underside of the sink deck.
- Run the faucet at full hot, then full cold.
- Move the handle left to right and up and down.
- Use the sprayer or pull-down head. Let it snap back.
- Check the underside of the sink around the faucet base with a flashlight.
What the pattern tells you:
- Water at the base of the faucet on top of the sink. The seal or O-ring at the base is worn.
- Water on the sprayer hose under the sink. The hose or its connection is leaking.
- Water at the handle only. The cartridge or O-rings inside the handle are worn.
- Drip from the spout when off. This is a worn cartridge or valve seat. It may not leak into the cabinet at all, but it wastes water.
A small drip adds up. The EPA says a faucet dripping one drip per second can waste more than 3,000 gallons per year, enough for more than 180 showers.
DIY fixes:
- Replace a worn cartridge or O-ring. Match the part to your faucet brand and model.
- Replace the sprayer hose if it is cracked or kinked.
- Swap the whole faucet if parts are hard to find.
If you decide to replace the faucet, our guide on kitchen faucet replacement: DIY or plumber helps you decide.
Call a plumber if:
- The faucet is corroded to the sink.
- You cannot remove the mounting nuts.
- The leak is inside the faucet body or deck and the faucet is old.
- Hard water has locked the parts together.
How Do You Test the Garbage Disposal for Leaks?
Short answer: Unplug the disposal first. Dry it, then run water and watch the top flange, the side drain and dishwasher hoses, and the bottom seam. A dye test helps. Colored water that appears at one spot shows the exact source. A cracked shell means replacement.
A disposal adds several seams to the drain side. It also carries the electrical risk. Cut power before you touch it, and never reach into the chamber.
A home-improvement guide describes a dye test for finding disposal leaks. It also sorts leaks into top, side, and bottom locations. The steps are simple:
- Unplug the disposal or switch off its breaker.
- Plug the sink drain and add a little water.
- Add a few drops of food coloring.
- Unplug the drain and let the colored water flow through.
- Look for colored drips on the unit and the connected pipes.
- Dry the unit again. Then run clear water with the power restored, if you must test under load.
Top leaks. Water at the top, where the disposal meets the sink, points to the mounting flange. The putty or gasket there has failed. Resealing means removing the disposal, which is a two-person job for many people.
Side leaks. Water on the side often comes from the discharge pipe or the dishwasher hose connection. Tighten the clamp or replace the gasket.
Bottom leaks. Water from the bottom of the unit often means an internal seal has failed or the shell is cracked. That calls for a replacement, not a repair.
Dishwasher connection. The dishwasher drain hose attaches to a small knockout port on the disposal. If the port was never opened, the dishwasher cannot drain. If the clamp is loose, water leaks when the dishwasher runs. A leak that appears only during a dishwasher cycle points here.
DIY fixes:
- Tighten the hose clamp.
- Replace the discharge gasket.
- Reseal the sink flange if you are comfortable removing the unit.
Call a plumber if:
- The shell is cracked or leaks from the bottom.
- The unit hums and does not spin. See our guide on a jammed garbage disposal before assuming it’s dead.
- The mounting ring is rusted or stuck.
- You want a new unit installed. We handle garbage disposal service and installation for Twin Cities homes.
What Can You Fix Yourself?
Short answer: Tightening slip nuts, replacing a worn flexible supply line, swapping a cracked plastic trap, redoing a strainer seal, and replacing a faucet cartridge are all common homeowner repairs. Each one needs basic hand tools, the water shut off, and a careful retest afterward.
Here is a quick guide by suspect:
| Suspect | Typical sign | Common DIY fix |
|---|---|---|
| Supply line | Drip with faucet off | Tighten nut or replace hose |
| Angle stop | Water at stem or body | Tighten packing nut, or replace |
| P-trap or slip nut | Water only while draining | Tighten, reseat washer, or replace trap |
| Strainer basket | Drip from top of tailpiece | Reseal with putty or gasket |
| Faucet cartridge | Water at handle | Replace cartridge or O-ring |
| Sprayer hose | Water when using sprayer | Replace hose |
| Disposal hose clamp | Water at the side | Tighten clamp or replace gasket |
Keep a few rules in mind:
- Change one thing at a time. If you replace three parts at once, you won’t know which one fixed it.
- Hand-tight first. Plastic fittings crack when over-tightened.
- Retest with tissue. Leave dry tissue under the repair for at least an hour. Check again the next day.
- Don’t use thread tape or sealant to cover a bad fitting. It hides the problem for a short time.
Some homeowners ask about permits. A simple faucet, trap, or supply line swap often does not need one. Rules vary by city, so check with your city or county before larger work.
When Should You Stop and Call a Plumber?
Short answer: Call when the leak continues after one tightening, when the disposal shell is cracked, when the shutoff valves will not close, when the cabinet floor is soft or soaked, or when you smell mold or sewer gas. These are signs the problem is bigger than a loose nut.
DIY has limits. Stop when you see these triggers:
- The leak returns after one tightening. A part is worn or cracked. More force will not fix it.
- The disposal body is cracked. It cannot be patched.
- A shutoff valve will not close. You cannot work safely without shutting off water.
- Corrosion on pipes at the wall. Old pipe can break when you touch it.
- The cabinet floor is soaked or soft. Water has been there a while.
- Mold smell or visible mold. Moisture has spread beyond the cabinet.
- Water stains on the ceiling below. The leak may be reaching another floor.
- You cannot find the source. A hidden leak can be in the wall.
Our team handles plumbing repair across the Twin Cities. We are locally owned and operated, so the person who answers your call lives in your community.
We also back our service with the On-Time Guarantee(R). We arrive in the window you pick, or we pay you $5 for every minute we are late, up to $300. In other words: “If there is any delay, it’s you we pay!”
What Should You Do About a Wet Cabinet?
Short answer: Remove everything, dry the cabinet with towels and a fan, and check the floor for softness. If the board is only damp, dry it fully and monitor it. If it is swollen, soft, or moldy, call a plumber to confirm the leak is fixed and a pro to assess the damage.
Most repair guides stop once the leak is fixed. Water damage is often the bigger problem. Here is what to do:
- Remove everything from the cabinet. Throw away soaked cardboard or sponges. They grow mold quickly.
- Mop up standing water. Use towels, then a wet-dry vacuum.
- Run a fan. Point it into the cabinet with the doors open. Run it for a day or two.
- Check the floor of the cabinet. Press a screwdriver tip into the board. If it sinks in, the board is soft.
- Look at the back and sides. Water often wicks up the back wall.
- Check the floor outside the cabinet. Water can travel under the cabinet toe-kick and into flooring.
- Smell the cabinet. A musty smell after drying means moisture is still trapped.
Minnesota winters make this worse. Homes run dry from furnace heat, and cabinets on exterior walls can sit cold. Moisture dries slowly in cold spots. If your sink sits on an exterior wall, allow extra drying time and watch for condensation.
When damage is serious:
- Soft or crumbling board needs replacement.
- Black or green growth that keeps returning needs professional help.
- Warped flooring around the cabinet suggests a larger leak.
Fix the source of the leak before you repair the cabinet. Otherwise, the new board gets wet too.
How Do You Tell a Leak Inside the Home From a Fixture Leak?
Short answer: Run a water meter test. Turn off all water use, read the meter, wait two hours, and read it again. If the reading changes at all, you probably have a leak somewhere. If it does not change, your leak is likely a small fixture drip or condensation.
Sometimes you can’t find a leak under the sink. Maybe the cabinet is dry but your bill is high. Or you see damp spots but no drip.
The EPA describes a simple test. Check your meter before and after a two-hour period when no water is being used. If the reading changes at all, you probably have a leak.
Here is how to do it:
- Make sure no one uses water. Turn off the dishwasher, washing machine, and ice maker.
- Find your water meter. It is often in the basement near the main shutoff, or in a pit outside.
- Write down the reading. Note the small leak indicator, if your meter has one. It is often a small triangle or dial that spins when any water moves.
- Wait two hours without using any water.
- Read the meter again.
If the numbers changed, water is moving somewhere. Close the angle stops under the kitchen sink. Wait another hour and read again. If the meter stops moving, the leak is on that sink’s supply side. If it keeps moving, the leak is elsewhere.
Our guide on reading your water meter to detect hidden leaks walks through different meter types.
Why Does a Small Leak Matter?
Short answer: Small leaks waste water, raise bills, and can damage cabinets and floors. The EPA says the average household’s leaks can account for more than 9,300 gallons of water wasted every year. Fixing easy leaks can save about 10 percent on water bills.
A slow drip seems like a nuisance. The numbers say it costs more than that.
According to the EPA, household leaks can waste nearly 1 trillion gallons of water annually nationwide. That is the combined total from homes across the country.
At the household level, the EPA also notes that the average household’s leaks can account for more than 9,300 gallons of water wasted every year. It adds that nine percent of homes have leaks wasting 50 gallons or more per day.
The EPA also says fixing easy household leaks can save about 10 percent on water bills. A loose nut or a worn washer is exactly that kind of fix.
One winter tip. The EPA notes that a family of four using more than 12,000 gallons per month in winter may have serious leaks. Winter use is lower in most homes, so a high bill in January is a warning sign. Check your bill, then check under the sink.
If your bills are climbing and you can’t find the cause, our leak detection service can help locate hidden leaks without guesswork.
What Is a Simple Routine to Prevent Sink Leaks?
Short answer: Check under the sink every month with a flashlight and a dry tissue. Replace old flexible supply lines before they fail. Move the angle stops once a year so they do not seize. Keep the cabinet clear so you see problems early.
Prevention costs less than repair. Add this to your routine:
- Monthly: Open the cabinet. Look and sniff. Touch each joint with a dry tissue.
- Twice a year: Run the disposal with cold water and a few ice cubes. Listen for odd noises. Check the hose clamps.
- Once a year: Turn each angle stop closed and open again. This keeps the valve from seizing.
- Every few years: Look at the flexible supply lines for rust, bulges, or fraying. Replace if in doubt.
- After any plumbing work: Check the area the next morning.
A smart leak sensor is another option. A small battery-powered sensor under the sink can alert your phone when it detects moisture. Our guide on smart water leak detectors covers what to look for.
Why Call Northern Benjamin Franklin Plumbing?
Short answer: We are locally owned and operated in the Twin Cities. We find the real source of the leak, fix it right, and show up in the window you choose. The On-Time Guarantee(R) means we pay you if we are late. Call (763) 296-1844 or book online.
Sometimes the cause is simple. Sometimes the leak points to something bigger, like aging pipes or hidden damage. A trained plumber can tell the difference fast.
When you call us, you get:
- A local team that knows Twin Cities homes, from older Minneapolis and St. Paul houses to newer suburban builds in Blaine, Maple Grove, and Coon Rapids.
- Clear answers about what failed and why.
- A fix that matches the problem, not a bigger job than you need.
- The On-Time Guarantee(R): we arrive in the window you pick, or we pay you $5 for every minute we are late, up to $300.
- Our 100% satisfaction guarantee.
“If there is any delay, it’s you we pay!”
If the leak is tied to a larger job, such as a repipe, ask us about financing options. We will explain what is available before any work starts.
Water damage grows quietly, so don’t wait on a wet cabinet. Call us at (763) 296-1844 or book online today. We will find the leak, fix it, and help you protect your home.
Frequently Asked Questions
How do I find a leak under my kitchen sink? +
Can I fix a leak under my kitchen sink myself? +
How do I know if my garbage disposal is leaking? +
What does a water meter test tell me? +
When should I call a plumber for a leak under the sink? +
Need a technician now?