
Toilet Fill Valve Replacement: Why Your Toilet Still Runs
Key Takeaways
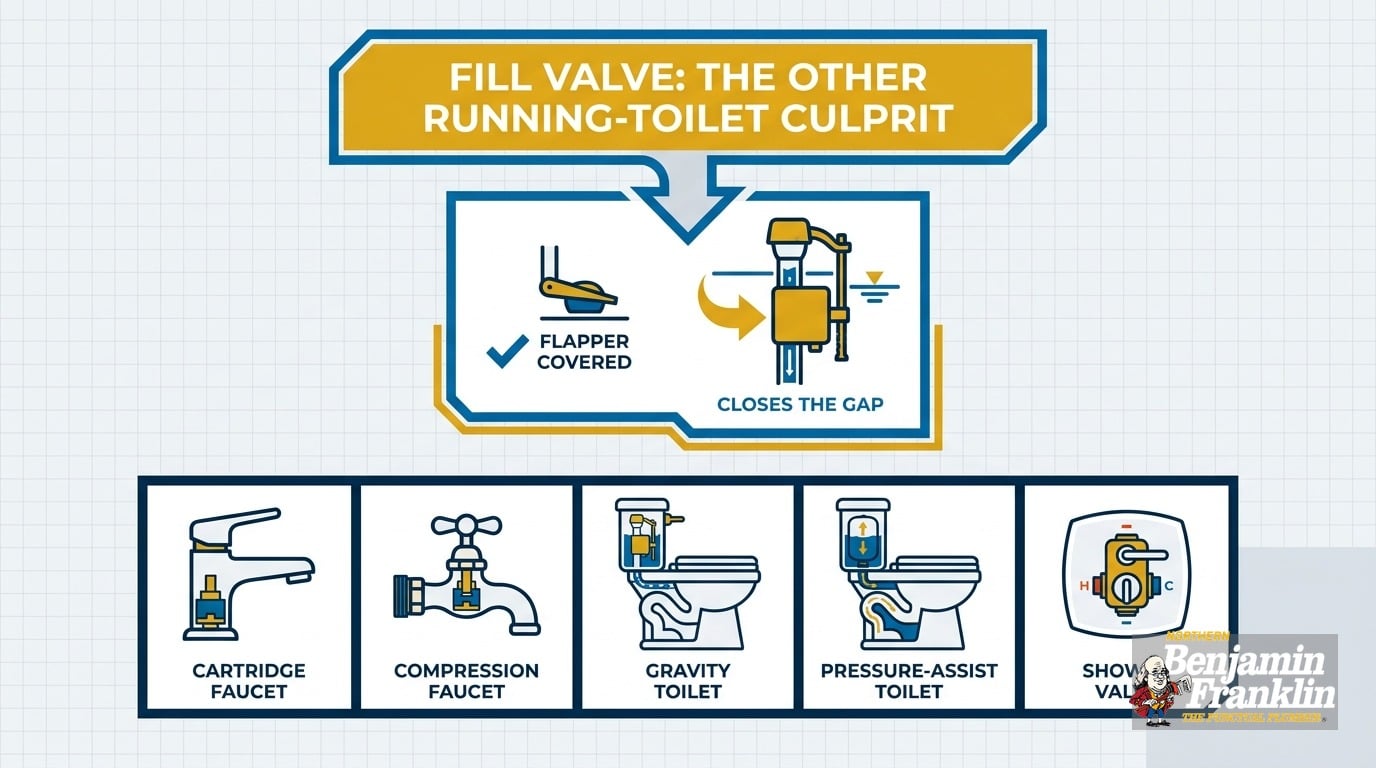
- A running toilet has two main causes: a worn flapper and a failing fill valve. Toilet fill valve replacement fixes the second cause, one that most DIY guides never cover.
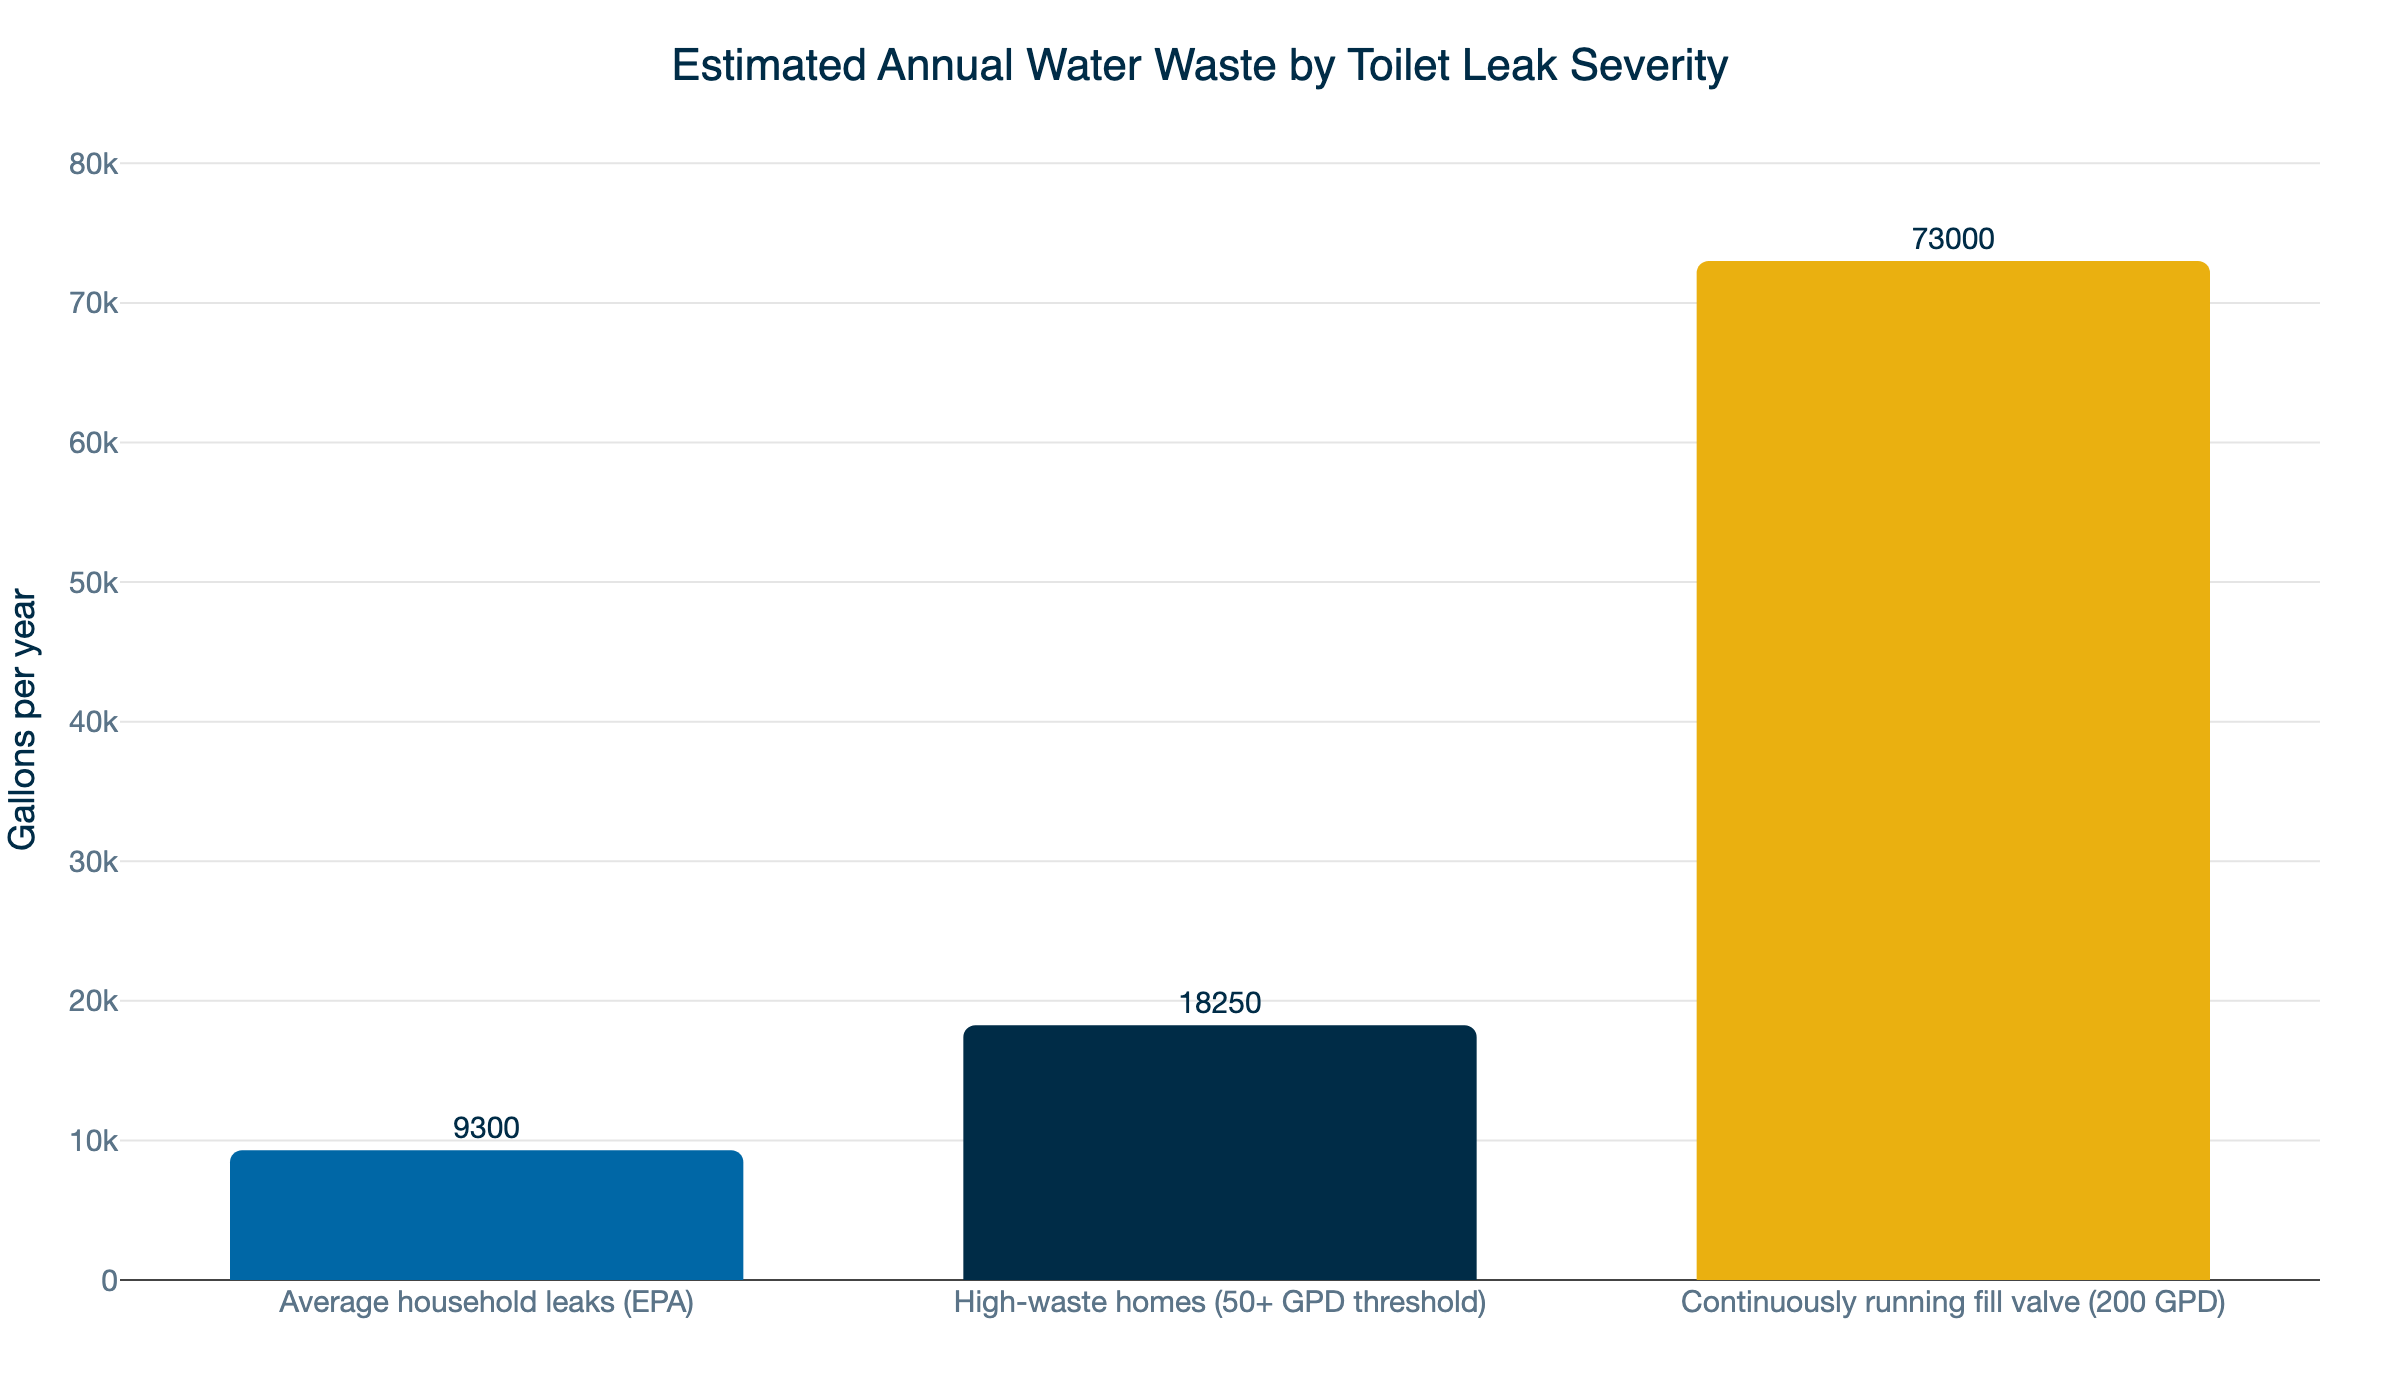
- The EPA estimates household leaks waste more than 9,300 gallons per year on average. The worst 9% of homes waste 50 or more gallons per day.
- A fill valve running continuously can exceed 200 gallons per day on its own, far above the EPA high-waste benchmark.
- Twin Cities water is moderately hard, roughly 7-9 grains per gallon from the Mississippi River. Mineral buildup accelerates fill valve failure in homes without a water softener.
- Many older Minneapolis and Saint Paul homes have angle stop valves that have not moved in decades. Forcing a corroded shutoff can shear the valve and turn a routine repair into an emergency.
- A fill valve swap inside the tank is generally a maintenance repair under Minnesota Plumbing Code (MN Rules Chapter 4715). Work that opens the water supply line may require a permit and a licensed plumber.
You Replaced the Flapper. It’s Still Running.
This is one of the most common calls we get at Northern Benjamin Franklin Plumbing.
A homeowner hears the toilet running. They look it up, buy a flapper for a few dollars, and swap it out. The toilet still runs.
That is not a failed repair. That is a diagnostic signal.
Two separate components can cause a running toilet: the flapper and the fill valve. Most tutorials online cover only the flapper. The fill valve, the other half of the equation, rarely gets its own article.
This post closes that gap. It helps you figure out which component is actually failing. It walks you through a toilet fill valve replacement if that is the right call. And it tells you clearly when the job is better left to a licensed plumber.
If your Twin Cities home has older plumbing, read the shutoff valve section before you touch anything under the tank. That one precaution can prevent a much larger repair.
Is It the Flapper or the Fill Valve?
The short answer: Drop food coloring into the tank and wait 10-15 minutes without flushing. If color appears in the bowl, the flapper is leaking. If the bowl stays clear but the tank refills on its own, or water runs into the overflow tube, the fill valve is the problem.
Here is how each component works.
The flapper sits at the bottom of the tank and creates a watertight seal between flushes. When the flapper warps or wears out, water seeps past it into the bowl continuously. You hear a faint running sound. Your water bill climbs.
The fill valve does a different job. After a flush, it refills the tank from the supply line. A float connected to the valve rises with the water level and signals the valve to close when the tank is full. When the fill valve fails, it cannot read the water level accurately. It opens at the wrong time, stays open too long, or bleeds water into the overflow tube.
How to test which part is failing:
- Put several drops of food coloring into the tank.
- Wait 10-15 minutes without flushing.
- If the bowl water turns color, the flapper is the problem.
- If the bowl stays clear but the tank refills on its own, lift the lid and watch the overflow tube. Water trickling into it means the fill valve is not shutting off correctly.
Both parts can fail at the same time. A toilet that has been running for months may need both replaced.
For the full range of toilet problems we handle, see our toilet service page.
What Does a Fill Valve Actually Do?
The short answer: The fill valve is the tall assembly on the left side of the tank. It controls water flow from the supply line into the tank after each flush. A float attached to the valve rises with the water level and shuts the valve off when the tank is full.
Most modern fill valves use a float-cup design: a cylindrical float that rides directly up and down the valve body. Older ballcock valves used a ball float attached to a horizontal arm. Float-cup models are more compact and are the standard replacement for both types.
Over time, the valve’s internal parts degrade. Rubber diaphragms stiffen. Plastic seats crack. Mineral deposits narrow the water passages. The valve begins to stick, fill too slowly, or stay partially open when it should be closed.
A fill valve that never fully closes is not just a noise problem. According to EPA WaterSense, household leaks waste more than 9,300 gallons per year on average. The worst 9% of homes waste 50 or more gallons per day from leaks. A fill valve running continuously can push those numbers far higher.
The average American family spends more than $1,000 per year on water. Fixing correctable household leaks saves roughly 10% on water bills. A single running fill valve can account for most of that savings opportunity.
What Are the Signs Your Fill Valve Is Failing?
The short answer: Listen and watch the tank. A running sound after the bowl finishes clearing, phantom refills with no flush, water in the overflow tube, a steady hiss from the tank, and slow refills after flushing all point to a fill valve that is wearing out.
Here is a full checklist:
- Running sound after the bowl clears. If water is still moving after the bowl finishes filling, the fill valve may be staying open or reopening too soon.
- Phantom refills. The tank refills on its own between flushes. The valve is responding to water loss, either past a worn seat or out through the overflow tube.
- Water in the overflow tube. Lift the lid during a fill cycle. Water spilling into the center tube means the float is set too high or the valve cannot shut off completely.
- Steady hissing from the tank. A constant hiss when the tank appears full is the valve leaking past a degraded diaphragm.
- Slow tank refill. A tank that takes more than three minutes to refill has restricted flow. Mineral deposits inside the valve body are the usual cause.
- Mineral crust at the valve base. White or yellowish buildup at the bottom of the fill valve is calcium and magnesium carbonate from hard water.
If you replaced the flapper already and these symptoms remain, toilet fill valve replacement is the next logical step.
Does Twin Cities Hard Water Shorten Fill Valve Life?
The short answer: Yes. Minneapolis and Saint Paul both draw from the Mississippi River. Historical water quality reports show total hardness in the range of approximately 120-150 mg/L, or roughly 7-9 grains per gallon. That is above the threshold where scale deposits measurably shorten the life of rubber and plastic inside a fill valve.
Calcium and magnesium carbonate do not stay dissolved. They deposit on surfaces wherever water sits or slowly evaporates. Inside a fill valve, those deposits coat the diaphragm seat, restrict the water passages, and stiffen the float mechanism. A valve that might last a decade in a soft-water home can degrade noticeably in four or five years in a Twin Cities home without water treatment.
You can confirm your own water quality numbers by checking the Minneapolis Consumer Confidence Report at minneapolismn.gov/resident-services/water-utility/water-quality/. Saint Paul residents can find the same information through the public works section at stpaul.gov. Both cities publish annual reports that include current hardness measurements.
If you are replacing fill valves more frequently than every five to seven years, the water hardness is the root cause. Treating the water protects the fill valve, the flapper, the water heater, and every other fixture the water touches. Our team handles water softeners and whole-home water treatment throughout the Twin Cities metro.
How Long Does a Toilet Fill Valve Typically Last?
The short answer: A fill valve in a Twin Cities home without a water softener should last five to seven years. In a soft-water home or with regular maintenance checks, seven to ten years is realistic. Water hardness, flushing frequency, and part quality all factor in.
The fill valve part itself is inexpensive at any hardware store. The time involved and the condition of the surrounding components are where the real variability comes in.
If your toilet is more than 15 years old and has never been serviced, opening the tank for a fill valve replacement often reveals more:
- A flapper that is also nearing the end of its service life
- A supply line that is stiff or showing mineral buildup at the connections
- A shutoff valve that has seized partially open and may not close fully
- Early signs of a slow leak at the base from a degraded wax ring
Addressing those findings together is almost always more efficient than replacing parts one at a time. Our post on toilet repair versus replacement walks through the full decision when a toilet has multiple issues at once.
Before You Start: Check the Shutoff Valve First
This step is missing from most DIY tutorials. In older Twin Cities homes, it is the most important precaution before any toilet repair.
The angle stop valve is the small shutoff behind the toilet, where the supply line meets the wall. It controls water flow to that toilet only. Before any fill valve work, you turn it clockwise to cut the water.
Here is the problem. Many angle stops in older Minneapolis and Saint Paul homes have not been turned in 20, 30, or 40 years. In homes built before 1960, the valve may be original equipment. Old chrome or galvanized fittings corrode and seize. Forcing a stiff shutoff with too much pressure can crack the valve body or shear the packing nut. When that happens, the only local stop is gone.
If the angle stop does not turn easily, stop. Do not force it. The right move is to call a plumber. A licensed plumber closes the main, replaces the angle stop, and completes the fill valve work in the same visit.
Knowing where your main shutoff is before you start any toilet work is not optional. Our guide to finding and testing your main water shutoff valve covers how to locate and verify it before you need it in a hurry.
How Do You Replace a Toilet Fill Valve?
The short answer: Shut off the water at the angle stop, flush the tank empty, and disconnect the supply line. Remove the old valve, set the new one to the correct height, install it, reconnect the supply line, and turn the water back on. Adjust the float to the right level and test. Plan for 30-45 minutes on a straightforward job with no complications.
What you need:
- A replacement fill valve (universal float-cup models fit most toilets)
- Adjustable pliers
- A sponge and a small bucket
- A flat-head screwdriver
Step 1: Shut off the water and empty the tank. Turn the angle stop clockwise until it stops. Flush once to empty most of the tank. Sponge out the water that remains in the bottom.
Step 2: Disconnect the supply line. Set the bucket under the supply connection at the base of the tank. Unscrew the supply line nut by hand or with pliers. Let the line drain into the bucket before setting it aside.
Step 3: Remove the old fill valve. Hold the fill valve body steady from inside the tank. From underneath, unscrew the locknut. Hand pressure is usually enough. If mineral buildup has tightened it, use pliers carefully. Lift the old valve straight up and out.
Step 4: Set the height on the new valve before installing it. The top of the new valve should sit about three inches above the overflow tube. Most replacement valves let you adjust height by twisting the upper and lower body sections. Set the height before inserting the valve into the tank.
Step 5: Install the new valve. Insert the threaded shank through the opening in the tank floor. From underneath, hand-tighten the locknut. Do not overtighten. Too much torque on a plastic locknut can crack the porcelain tank, which is a much larger problem than a fitting you snug up later.
Step 6: Attach the refill tube. Clip the small refill tube from the new valve onto the outside of the overflow tube. The tube should not extend down into the overflow tube. A tube that runs inside the overflow creates a constant siphon and causes a slow, continuous run.
Step 7: Reconnect the supply line. Thread the supply line nut back onto the fill valve shank. Hand-tighten, then snug it with pliers. One quarter-turn past hand-tight is usually sufficient.
Step 8: Turn the water back on and set the float. Open the angle stop slowly. Let the tank fill. The water level should settle about one inch below the top of the overflow tube. Adjust the float height using the adjustment screw or clip on your specific valve model.
Step 9: Test. Watch the connection at the base of the tank for drips. Flush several times. Confirm the tank reaches the correct level, the valve shuts off cleanly, and no water runs into the overflow tube.
When Should You Call a Plumber for Toilet Fill Valve Replacement?
The short answer: Call a plumber if the shutoff valve will not turn freely, if the supply line is corroded or old, if the locknut is rusted solid on the tank fitting, or if you find a crack in the tank after draining it.
Here is the complete list of stop-and-call situations:
- The angle stop will not turn. Shut off the main and call. Do not force it.
- The supply line is stiff, braided, or shows crust at the fittings. Old supply lines fail under the stress of being disconnected and reconnected. Having it replaced during the same visit costs far less than a supply line failure later.
- The locknut at the base of the tank is rusted solid. Forcing it risks cracking the porcelain.
- Water is leaking from the base of the toilet, not the tank. That is a wax ring issue. A different repair entirely.
- The toilet is more than 20 years old and has never been serviced. A plumber’s inspection often prevents the follow-up call after a DIY repair uncovers something larger.
- The tank has visible cracks or chips. A cracked tank cannot be safely repaired. The toilet needs to be replaced.
The Minnesota Department of Labor and Industry requires a license for plumbing work beyond basic maintenance and a permit when work opens the water supply line. Minnesota law allows homeowners to do their own plumbing in their own single-family home. But when the shutoff is seized or the supply line looks questionable, a licensed plumber costs far less than the alternative.
Small Leak, Real Cost
Fixing correctable household leaks saves homeowners about 10% on their water bills, according to EPA estimates. For a Twin Cities household spending near the national average on water, that adds up over a year.
A failing fill valve does not flood a bathroom. It runs quietly in the background while the meter runs. That is precisely what makes it costly. A fill valve failure combined with a dripping faucet or other unaddressed issues can push annual waste well beyond what the EPA classifies as average.
For Twin Cities homeowners with moderately hard water and older housing stock, the fill valve is not a one-time repair. It is a part with a service life. Mark the replacement date on the inside of the tank lid. Check the valve at each annual plumbing inspection. A hissing valve or a slow refill in year four is an early warning. Acting on it is cheaper than waiting until it fails completely.
If you are replacing fill valves every three to four years, the water hardness is the underlying problem. Treating the water protects the fill valve, the water heater, and every other plumbing fixture in your home. Our team handles water softeners and water treatment systems across the full Twin Cities metro: Minneapolis, Saint Paul, Blaine, Bloomington, Brooklyn Park, Coon Rapids, Maple Grove, and the surrounding communities.
Ready to Fix It? We Come on Time.
Northern Benjamin Franklin Plumbing is locally owned and operated in the Twin Cities. Our licensed plumbers handle toilet fill valve replacement, angle stop replacements, supply line swaps, and the full range of residential plumbing repairs.
Every appointment is backed by our On-Time Guarantee(R). We show up in the window you choose. If there is any delay, it’s you we pay!
Call (763) 296-1844 or book online.
Frequently Asked Questions
How do I know if my fill valve or flapper is causing my toilet to run? +
How long does a toilet fill valve last? +
Can I replace a toilet fill valve myself? +
Do I need a permit to replace a toilet fill valve in Minnesota? +
Need a technician now?